Welcome to my blog. Thanks for visit my site.I request to you please share my blog of your friends.

Ads

How to Add a Printer to your Shared Home Network

♠ Posted by Unknown in
Once you have a wireless network set up at home, you will soon feel spoiled by the freedom of accessing the Internet from anywhere in your house. You can e-mail from bed, track your Fantasy Football stats in front of the TV, and look up recipe information from the kitchen. After growing accustomed to this level of convenience, you will likely feel bothered if you have to walk downstairs to print a picture or document. Traditionally, it was necessary to plug your computer directly into the printer in order to print. Fortunately, you can set up your home wireless network so that all networked computers share the same default printer, regardless of whether they are physically connected to the machine.
1. From the main network computer, go to the Control Panel from the Start menu and click “Printers and Faxes.” Next, click “Add a printer.”
This will start the Add Printer Wizard. Click “Next.” Take note that if your printer meets the specifications in the informational paragraph, you do not need to go through the formal set up process.


2. Select the option for “A network printer, or a printer attached to another computer.” 
Once you have highlighted this selection, click “Next.”
3. Choose to “Browse for a printer” and locate the printer in the network. In order Once you have found the correct printer, click “Next.”
This will bring up a warning screen, as seen below. Click “Yes” to continue.
4. On the next screen, confirm your choices and click “Finish.” At this point, the printer should be accessible to all computers on your network. You can search for and use the printer in the same way you would use a physically-connected printer from all computers in the network.
Tip: You will need to set the printer as the default individually on each computer, but there is no limit on the number of machines that can designate a given printer as their default.

How to Use Your iPod for Portable Storage

♠ Posted by Unknown in
There are many types of mp3 and portable music players available, but anyone who walks down a busy city street at rush hour can tell you that the iPod has become the most ubiquitous. A decade after its initial launch, iTunes now comes standard on many computers or is one of the first programs users download to accommodate their music collection. Aside from the ability to carry your favorite songs with you wherever you go, many iPod owners don’t realize just how functional this gadget can be.
While iPods can store a large number of music files, they can also provide a more general level of portable file storage. You can use your iPod to save and transport valuable computer files, documents, software, and more. As each new generation of mp3 players tend to have larger memory capacity, this is a viable option not only for portable storage but as an external drive.

1. Connect your iPod to your computer. This should be straight-forward if you’ve owned the device for awhile. If you have just purchased the player, follow the instructions enclosed in the packaging to ensure it is ready for use.
2. Once the iTunes program is open and running, select the iPod icon in the Source pane and click the tab labeled “Summary.”

3. Select either “Enable disk use” or “Manually manage music and videos.” Both of these options will allow you to use your iPod as a disk. However, be aware that choosing “Manually manage music and videos” will stop your iPod from automatically syncing with iTunes.

3. Drag files into iPod disk folder. Once you have changed your iPod settings, your iPod will appear as a disk either on your desktop or in your “My Computer” folder. Open this folder and drag files into it to store them on your iPod.

Reminder: Always eject your iPod from your computer before disconnecting. There is an eject function within iTunes, or you can right click on the disk icon and select to eject manually. Remembering to eject your iPod is particularly important when using your iPod as a storage device.

Customise and configure your PC with Windows Tweaker 5.0

♠ Posted by Unknown in

Windows is a highly configurable operating system, with hundreds of settings and options available. But taking full advantage of this can be a challenge, as many settings are buried deep in the Registry, while others are scattered around a host of programs and applets.
Windows Tweaker aims to help by giving easy access to 100+ system tweaks (on Windows Vista and later) from a single interface. It’s portable, open source and entirely free of adware and other annoyances, so we downloaded the latest version 5.0 to take a look.
The program has a surprisingly sparse interface. While most tweaking tools try to impress you by displaying just as many options on one screen as they can, here everything is spread across 11 categories and 50+ subcategories. This does give it a clean, uncluttered, modern look, though, and a search tool means it’s easy enough to find tweaks: just type a keyword – “desktop”, say – and any related options are listed.
The interface is cleaner, simpler, less intimidating than some of the competition
The tweaks aren’t always as impressive. Plenty are already easy to find from Windows (folder display options, default power button action, Windows update settings), while others are based around very familiar tips (God Mode folder).
We also suspect there are a few bogus tips which do precisely nothing at all, such as “unload unused DLLs after an application is closed”. These won’t do any harm, either, but what they suggest is the developer has assembled his tweaks by just copying everything he’s seen on other tip sites, which doesn’t inspire much confidence.
Despite that, there are also plenty of useful options. A “Right-Click” section, for example, can extend your file/ folder context menus with options like “Copy to…”, “Move to…”, “Encrypt”, “Decrypt”, “Open with Notepad”, and more.
Maybe you’d like to limit the harm a non-technical user can do to their system? The “Restrictions” menu can disable the Registry Editor, Task Manager, Control Panel, even the right-click option in Explorer.
There are several other tweaks which normally require Registry access. You can have your system show a message before a user logs on, for example. There’s an option to set the number of icons displayed when Alt+Tabbing. Interface tweaks include adding Recycle Bin to My Computer, and extending Control Panel with a link to Registry Editor.
We have a few minor issues with the program. In particular, it occasionally tells us that a particular tweak is only available in this or that version of Windows. Well, great, but why not simply hide that tweak if it’s not available on the current system?
Windows Tweaker has one or two problems, then, but there are also some helpful and time-saving tweaks here, and the search tool makes them easy to find. Give it a try.

Troubleshoot Windows 7/ 8 service triggers with Service Trigger Editor

♠ Posted by Unknown in

If you’ve ever spent time troubleshooting low-level PC problems then you’ll know that understanding Windows services can be very helpful. The standard Services applet (Win+R > services.msc) tells you a lot about what’s happening on your system – but there is one important exception.
Windows 7 and 8 support service “triggers”, a mechanism which allows Windows services to start when a particular event occurs (a device is plugged in to the computer, say). The Services applet highlights these by listing their Startup Type as “Manual (Trigger Start)” or “Automatic (Trigger Start)”, but double-click a triggered service and it won’t tell you anything more.
You can view and control triggers via the SC command line tool (try sc query “NcbService”), but that’s hardly convenient. And so if you’re troubleshooting a PC and trying to find out why a service starts (or doesn’t), Service Trigger Editor is a free tool which can tell you more.
Just select a service and its triggers are displayed in the lower pane
The program is portable, conveniently: just download it and run. It immediately displays a basic view of your services: Name, Description, Status (Running/ Stopped) and “# Triggers”. And you can use it just as a simple service admin tool, where you can start or stop a particular service (right-click it, choose an option).
Life gets more interesting if you select a service with a number of triggers, as a lower pane then tells you what these triggers are. If we click “Network Connectivity Assistant”, say, we can see this will start when our computer leaves or joins a domain. Or selecting “Sensor Monitoring Service” tells us this will start when three specific devices are connected, with the GUID of each device.
This is all very low-level technical information, aimed very much at experts and system admins, so don’t be surprised if you’ve absolutely no idea what any of it means (in most cases we didn’t, either). But it could still be useful. If a service is working on one PC, say, not on another, you could at least compare the triggers and see if they’re the same.
But if you’re confident in what you’re doing, Service Trigger Editor also allows you to edit or remove an existing trigger, or add new triggers of your own – just double-click the Add, Edit/ View or Remove buttons. And so you’re able to start or stop a service when your computer joins or leaves a domain, opens or closes a (Windows) firewall port, an IP address becomes available or unavailable, a certain device is connected, a packet arrives on a network protocol, and more.

While Service Trigger Editor is easy enough to use, it should also be treated with respect. Change something important and you’ll cause far more problems than you solve. But if you’re already happy diagnosing Windows service issues via the standard Services applet, the program will help you better understand how your PC is set up, and we’d recommend keeping a copy around for emergencies.

Motherboard

♠ Posted by Unknown in

The motherboard is the main circuit board in a PC. It contains all the circuits and components that run the PC.

Major Components found on the motherboard are: 

  • CPU - the Central Processing Unit is often an Intel Pentium or Celeron processor. It is the heart of every PC. All scheduling, computation and control occurs here.
  • BIOS - Basic Input Output System is a non-volatile memory that contains configuration information about the PC. It contains all the code required for the CPU to communicate with the keyboard, mouse video display, disk drives and communications devices.

    When a PC is powered on it uses the BIOS 'boot code' to set up many required functions that bring the PC to a point where it is ready to work.
  • RTC - the Real Time Clock chip keeps date, day and time in a 24 hour format just like your watch. The PC uses this clock to 'time stamp' files as they are created and modified. When you print a file it time stamps the pages as they are printed.
  • Chip Set - these are large chip(s) that integrate many functions that used to be found in separate smaller chips on the motherboard. They save space and cost.

    The functions performed by these chip sets often broken into two devices with one providing an interface from the CPU to the memory and the other providing controllers for IDE, ISA, PCI and USB devices (see below).
Primary Connectors found on the motherboard are: 
  • Power - A 20 pin connector accepts a plug from the power supply. This plug carry DC power to all the circuits on the motherboard.
  • Keyboard - A Mini-din 6-pin (round) connector found at the back of the motherboard is where the keyboard plugs in.
  • Mouse - A Mini-din 6-pin connector found next to the keyboard connector is where the where the mouse plugs in.
  • Display - This connector is not integrated into the motherboard but is included in this list since its function is absolutely necessary. It is a 15-pin, D-shell type connector found on a video card that plugs into the AGP connector of the motherboard (see below).
  • IDE - stands for Integrated Drive Electronics. These are 40 pin connectors that provide a place to connect the ribbon cables from the drives (hard and CD/DVD). All data between the motherboard and the drives is carried in these cables. They are not accessible unless the PC cover is removed.
  • FDD connector - it is similar in function to the IDE connector. It is a 34 pin ribbon connector that carries data between the motherboard and any floppy drive installed in the PC. Not accessible with PC cover on.
  • DRAM - Dynamic Random Access Memory connectors for SIMM and DIMM type memory modules. Not accessible with chassis cover on.
  • Serial Connectors

    • Standard Serial Connector - This connector has been around in PCs since they first appeared. It was originally located on ISA expansion type cards (see below). Today it is an integral part of newer motherboards. It is a 9- pin, D-shell connector that allows you to connect external devices with serial ports to your PC. The maximum data rate is 115 KB/s.
    • USB - Universal Serial Bus This is a relatively new serial bus. Originally specified as low speed, 1.2 Mb/s, it was enhanced to full speed, 12Mb/s. The latest version 2.0 is specified as high speed, 400 MB/s.

      Someday USB will completely replace the standard serial connector that has been the workhorse serial port in earlier PCs. USB is now a standard connector on all new motherboards.

      Unlike serial and parallel ports, the USB port is designed to power devices connected to it. The devices must be low power devices and must be able to reduce their current draw to less than 0.5uAmps when commanded to do so by the PC.
  • Parallel Connectors

    • Centronix or Standard Parallel - This connector has been around in PCs since they first appeared. It has 37-pins and is now integrated on new motherboards. It is usually used to connect your printer to the PC and moves data at about 1MB/s.
    • SCSI - Small Computer System Interface moves data at a maximum of up to 80Mb/s. It not integrated into most PC motherboards. It can be added to a PC as an Expansion card (see below). Some printers and hard disk drives use SCSI interfaces.
  • Expansion Card Connectors - The CPU connects to expansion card connectors through one of the chip set ICs mentioned above. They are located on the motherboard near the rear of the PC. These connectors allow special function cards to plug into and work with the PC.

    Before motherboards integrated the serial and centronix connectors they were found on expansion boards that plugged into ISA slots.

    Most PCs have the following expansion connector types:

    • ISA - Industry Standard Architecture connectors have been around since 1980 and first appeared in the IBM XT PC. This type of slot still appears on some newer motherboards so that older expansion boards can still be used. However, many motherboards no longer have ISA connectors on them.
    • PCI - Peripheral Component Interconnect is a newer and faster interface that accepts all expansion cards that have a PCI interface.
    • AGP - Accelerated Graphics Port is a connector that is designed to work with video cards. Your video display plugs into and is controlled by one of these video cards. Many modern video cards offer enhanced 3D-graphics and fast, full motion video.

Command Prompt Tricks, Hacks & Codes

♠ Posted by Unknown in
Command Prompt is one of the most powerful tools in Windows; but sadly, it is also the most ignored one. Things were not always like this; but with the advent of GUI based operating systems, people started feeling that computing through command based tools was boring. This ultimately lead the command prompt into obscurity. 

However, the command prompt is not useless. In fact, it can be pretty useful. This article provides some excellent tricks, secrets and hacks that will make you realize that the Windows Command Prompt is not only useful but also a tool that you should definitely give more respect to.

Ascii star wars command prompt
1-Watch ASCII version of the Star Wars Episode IV movie
Surprised yet? You can watch an ASCII version of the full Star Wars Episode IV Movie right in your command prompt window. Just open command prompt, type a small code and the movie will start playing immediately. Read the complete instructions here


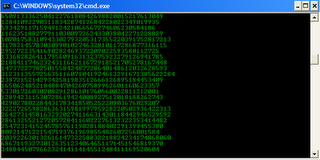
2- Create Matrix falling code effect
Have you watched “The Matrix”? Of course, you have. Then, you already know what I am talking about. In case you still don't know what I mean, take a look at this image! You can create the same effect in command prompt using just a few lines of code. Head over to this post for instructions.

command prompt tricks

3- Make Folders that you cannot delete
Are you tired of accidentally deleting important folders? Well, if you are, you can learn how to makeundeletable folders here.

4- Shutdown your computer giving a funny reason
What if your computer shuts down saying that it is tired and doesn't want to work anymore? It would be fun, wouldn't it? You can do so by reading the instructions here.

5- Know your IP address, DNS Server's address and a lot more about your Internet Connection
Command Prompt can even let you know your IP address. Just type ipconfig/ all in the command prompt and press Enter. Along with your IP address and DNS servers, command prompt will also return a ton of information like your host name, primary DNS suffix, node type, whether IP Routing ,Wins Proxy, and DHCP are enabled, your network adapter's description, your physical (MAC) address etc . 

6- Know if your neighbours are stealing your WiFi connection
command prompt codes
Command Prompt can let you know if someone is connected to your Local Area Connection and using it. Just follow the steps:- 
1) Open your browser and visit http://192.168.1.1 or http://192.168.0.1 depending on your router. 
2) Find the tab that mentions “Attached Devices” or something similar.
3) Find the computer name, IP address and MAC Address (sometimes called Physical Address or Hardware Address) of your computer using the previous trick.
4 )Compare it with those displayed by your router in Step 2. If you notice some strange devices, then your neighbour has been sneaking in on your internet connection and it is best to add a password.

7- Know if someone is hacking your computer/ Trace a Hacker
Command Prompt hacks
Want to know if someone is hacking your computer? Command Prompt can help you find if someone you don't know is connected to your computer stealing private data. Just execute netstat -a and the command prompt will return a list of computers that your computer is connected to. In the results returned, Proto column gives the type of data transmission taking place (TCP or UDP) , Local address column gives the port with which your computer is connected to an external computer and the Foreign Address column gives the external computer you are connected to along with the port being used for the connection. State gives the state of the connection (whether a connection is actually established, or waiting for transmission or is “Timed Out”).


These tricks work on Windows 8.1, Windows 8, Windows 7, Windows Vista, Windows XP and all previous versions of Windows.Now you know just how useful command prompt can be. Find more awesome tips and tricks in the Tricks section.

How to Fix a Slow Windows 7 Computer

♠ Posted by Unknown in
Most people love using Windows 7. That’s because it’s by far the nicest and the most productive Microsoft operating system to date. But there can still be glitches, errors, and lags. The good thing about Windows 7 is that it has lots of tools to troubleshoot and repair a slow computer. Here is a guide to where to find them and how to use them.

1. Problem Steps Recorder

fix slow computer windows 7
Problem Steps Recorder is a great solution to get a detailed description of the problem, so that you can either review the report yourself or send it to a tech support team. Basically, this tool records everything happening on the computer that needs troubleshooting. It records all mouse clicks and everything that is pressed on the keyboard, takes screenshots, and then saves the report as a zipped MHTML file. This file can be easily emailed and analyzed. To enable Problem Steps Recorder, click on Start, type PSR and hit Enter. Then click on Start Record. To save a report, just stop recording your computer activity.

2. Troubleshoot problems

If something in Windows 7 starts behaving in a weird way and you have no idea why, go to the Control Panel, locate the “Find and fix problems” (Troubleshooting) option and you’ll be able to access the Windows 7 troubleshooting tools. They are easy-to-use wizards and can fix common problems, clean your system, check your settings, and lots more. 

3. Discover bottlenecks

Under normal circumstances, Windows 7 easily outperforms Vista and XP. Nevertheless, your computer can still seem too slow from time to time. Most likely it’s an application or a process that’s slowing you down. Windows 7 makes it really easy to find bottlenecks with the help of Resource Monitor. Just click on Start, type RESMON and hit Enter to launch the tool. When it opens, click on the CPU, Memory, Disk and Network tabs to see which processes are hogging your system and using up your bandwidth. When you find the process that’s holding you back, you’ll be able to try to fix it right from the Resource Monitor. For example, if a process is locked up, right-click on it and select Analyze to see where the problem lies.

4. Repair your computer

If something goes seriously wrong and Windows 7 fails to start, it might be possible to repair your computer without the installation CD. Just boot your PC and press F8 during startup. You should see an option called Repair Your Computer. Select it and press Enter to see the recovery options Windows 7 has to offer.
These Windows 7 tools will help you troubleshoot and fix a slow computer in a quick and easy way. To prevent your computer from slowing down, use maintenance utilities like disk cleanup and defrag to keep your PC in top shape.

Also readTips to speed up a slow Windows computer

All secret Android codes, tips and tricks for your Android mobile devices <><><>

♠ Posted by Unknown in
Secret Codes                                 Functions/Description


  • *#06#                                       To check IMEI of your device, enter this code.
  • *#0*#                                       To enter service menu on the very new Android phones.
  • *#0228#                                   To check battery status.
  • *#9090# / *#1111#                  To make device in Service mode.
  • *#*#4636#*#*                        To get information about battery, usage statistics and device.
  • *#*#34971539#*#*                 To get all information about camera.
  • *#12580*369#                         To get software and hardware info.
  • *#228#                                     For ADC Reading.
  • #7353#                                     To hide test menu 2/Self Test Mode.
  • ##7764726                               To hide service menu for Motorola Droid.
  • *#*#273283*255*663282*#*#*   For backup of our all media files.
  • *#*#232338#*#*                       It display the Wi-Fi mac address.
  • *#7465625#                               To view status of lock-phone.
  • *#*#3264#*#*                           To show RAM version.
  • *#*#44336#*#*                         To display build time and change list number.
  • *#*#232337#*#                         To see or display device’s Bluetooth address.
  • *#*#197328640#*#*                 It enables test mode for service.
  • *#*#8351#*#*                           To enable voice dial mode.
  • *#*#8350#*#*                           To disable the voice dial mode.
  • *#*#0842#*#*                           To test Back-light/vibration.
  • *#*#2664#*#*                           To test the touch-screen.
  • *#*#0289#*#*                           For Audio test.
  • *#*#0*#*#*                               For LCD display test.
  • *#*#232331#*#*                       To test Bluetooth of any Android device.
  • *#*#0283#*#*                           To perform a packet loop-back test.
  • *#*#1575#*#*                           For advanced GPS test.
  • *#*#1472365#*#*                     To Perform a quick GPS test.
  • *#*#0588#*#*                           To perform a proximity sensor test.
  • *#*#7262626#*#*                     To perform field test.
  • *#*#232339#*#*                       Testing Wireless LAN.
  • *#9090#                                     To Diagnose configuration of device.
  • *#872564#                                 To control U-S-B logging.
  • *#9900#                                     System dump mode. 
  • *#*#7780#*#*                           Reset  to factory state.
  • *2767*3855#                             To format Android device.
  • *#*#4986*2650468#*#*          To get pda, phone, H/W and RF Call Date.  
  • *#*#1234#*#*                            To know about pda and firmware version.                                      
  • *#*#1111#*#*                           For FTA Software version. 
  • *#*#2222#*#*                           For FTA Hardware version.
  • *#*#7594#*#*                          To change power button behaviour once code enabled.      
  • *#*#8255#*#*                           To launch Google Talk service monitor.


Note :-

And one important thing, I want to share that if you think there's some kind of problem in our above mentioned codes, inform us through comments, give your feedback (really important for us) and also discuss your problem with us regarding to this post. We feel very grateful to you if you give feedback to our posts because it makes us to understand how we can improve our posts or to resolve problems. So feel free to ask us about anything related to our posts.

How To Add Recycle Bin Feature On an Android Device ???

♠ Posted by Unknown in
If you’ve ever used a windows computer, then you should be familiar with the concept of a Recycle Bin. It works by catching the deleted files and gives you an option to restore them back to its original location. This might not come useful in our day to day work cycle but when you accidentally delete your files or folder, the recycle bin will always come to your rescue.
On Android there is no such feature and whenever you delete something, it gets deleted permanently. So in case you accidentally delete a picture or a file on your Android phone or tablet, it will be gone forever.
Although Android devices don’t have this feature, but there are free third-party apps available on Play Store that allows you to add a recycle bin like feature on your Android device. One of the best among them is Dumpster. This app works just like the recycle bin on your computer. It gives you the ability to restore deleted pictures, music files, videos and other type of files. So with this app installed on your phone, you no longer have to worry about making the mistakes.

How to Get Recycle Bin Feature on Android with Dumpster

  1. Download and Install Dumpster on your Android phone or tablet.
  2. Once installed, open the app and accept the ‘Terms and Conditions’.
  3. dumpster pic1
  4. In the initial setup page, select all the files types that you want the app to save when they are deleted and tap on ‘Next’ button.
  5. dumpster-pic2
    Note:If you have a rooted Android device, you can turn on the “Allow Root Access” option for better working of this app.
That’s it, Dumpster is now all configured to save all the items that are deleted from your device. Next time if you accidentally delete your files, just go the the Dumpster app and if you want to restore a deleted item, simply select it and tap the ‘Restore’ button to restore it.
dumpster-pic3
If you like my post so don't forget to subscribe and share this post on your friends.