Welcome to my blog. Thanks for visit my site.I request to you please share my blog of your friends.

Ads

Showing posts with label Computer Tips & Tricks. Show all posts

How to Add a Printer to your Shared Home Network

♠ Posted by Unknown in
Once you have a wireless network set up at home, you will soon feel spoiled by the freedom of accessing the Internet from anywhere in your house. You can e-mail from bed, track your Fantasy Football stats in front of the TV, and look up recipe information from the kitchen. After growing accustomed to this level of convenience, you will likely feel bothered if you have to walk downstairs to print a picture or document. Traditionally, it was necessary to plug your computer directly into the printer in order to print. Fortunately, you can set up your home wireless network so that all networked computers share the same default printer, regardless of whether they are physically connected to the machine.
1. From the main network computer, go to the Control Panel from the Start menu and click “Printers and Faxes.” Next, click “Add a printer.”
This will start the Add Printer Wizard. Click “Next.” Take note that if your printer meets the specifications in the informational paragraph, you do not need to go through the formal set up process.


2. Select the option for “A network printer, or a printer attached to another computer.” 
Once you have highlighted this selection, click “Next.”
3. Choose to “Browse for a printer” and locate the printer in the network. In order Once you have found the correct printer, click “Next.”
This will bring up a warning screen, as seen below. Click “Yes” to continue.
4. On the next screen, confirm your choices and click “Finish.” At this point, the printer should be accessible to all computers on your network. You can search for and use the printer in the same way you would use a physically-connected printer from all computers in the network.
Tip: You will need to set the printer as the default individually on each computer, but there is no limit on the number of machines that can designate a given printer as their default.

How to Use Your iPod for Portable Storage

♠ Posted by Unknown in
There are many types of mp3 and portable music players available, but anyone who walks down a busy city street at rush hour can tell you that the iPod has become the most ubiquitous. A decade after its initial launch, iTunes now comes standard on many computers or is one of the first programs users download to accommodate their music collection. Aside from the ability to carry your favorite songs with you wherever you go, many iPod owners don’t realize just how functional this gadget can be.
While iPods can store a large number of music files, they can also provide a more general level of portable file storage. You can use your iPod to save and transport valuable computer files, documents, software, and more. As each new generation of mp3 players tend to have larger memory capacity, this is a viable option not only for portable storage but as an external drive.

1. Connect your iPod to your computer. This should be straight-forward if you’ve owned the device for awhile. If you have just purchased the player, follow the instructions enclosed in the packaging to ensure it is ready for use.
2. Once the iTunes program is open and running, select the iPod icon in the Source pane and click the tab labeled “Summary.”

3. Select either “Enable disk use” or “Manually manage music and videos.” Both of these options will allow you to use your iPod as a disk. However, be aware that choosing “Manually manage music and videos” will stop your iPod from automatically syncing with iTunes.

3. Drag files into iPod disk folder. Once you have changed your iPod settings, your iPod will appear as a disk either on your desktop or in your “My Computer” folder. Open this folder and drag files into it to store them on your iPod.

Reminder: Always eject your iPod from your computer before disconnecting. There is an eject function within iTunes, or you can right click on the disk icon and select to eject manually. Remembering to eject your iPod is particularly important when using your iPod as a storage device.

Command Prompt Tricks, Hacks & Codes

♠ Posted by Unknown in
Command Prompt is one of the most powerful tools in Windows; but sadly, it is also the most ignored one. Things were not always like this; but with the advent of GUI based operating systems, people started feeling that computing through command based tools was boring. This ultimately lead the command prompt into obscurity. 

However, the command prompt is not useless. In fact, it can be pretty useful. This article provides some excellent tricks, secrets and hacks that will make you realize that the Windows Command Prompt is not only useful but also a tool that you should definitely give more respect to.

Ascii star wars command prompt
1-Watch ASCII version of the Star Wars Episode IV movie
Surprised yet? You can watch an ASCII version of the full Star Wars Episode IV Movie right in your command prompt window. Just open command prompt, type a small code and the movie will start playing immediately. Read the complete instructions here


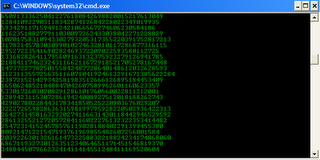
2- Create Matrix falling code effect
Have you watched “The Matrix”? Of course, you have. Then, you already know what I am talking about. In case you still don't know what I mean, take a look at this image! You can create the same effect in command prompt using just a few lines of code. Head over to this post for instructions.

command prompt tricks

3- Make Folders that you cannot delete
Are you tired of accidentally deleting important folders? Well, if you are, you can learn how to makeundeletable folders here.

4- Shutdown your computer giving a funny reason
What if your computer shuts down saying that it is tired and doesn't want to work anymore? It would be fun, wouldn't it? You can do so by reading the instructions here.

5- Know your IP address, DNS Server's address and a lot more about your Internet Connection
Command Prompt can even let you know your IP address. Just type ipconfig/ all in the command prompt and press Enter. Along with your IP address and DNS servers, command prompt will also return a ton of information like your host name, primary DNS suffix, node type, whether IP Routing ,Wins Proxy, and DHCP are enabled, your network adapter's description, your physical (MAC) address etc . 

6- Know if your neighbours are stealing your WiFi connection
command prompt codes
Command Prompt can let you know if someone is connected to your Local Area Connection and using it. Just follow the steps:- 
1) Open your browser and visit http://192.168.1.1 or http://192.168.0.1 depending on your router. 
2) Find the tab that mentions “Attached Devices” or something similar.
3) Find the computer name, IP address and MAC Address (sometimes called Physical Address or Hardware Address) of your computer using the previous trick.
4 )Compare it with those displayed by your router in Step 2. If you notice some strange devices, then your neighbour has been sneaking in on your internet connection and it is best to add a password.

7- Know if someone is hacking your computer/ Trace a Hacker
Command Prompt hacks
Want to know if someone is hacking your computer? Command Prompt can help you find if someone you don't know is connected to your computer stealing private data. Just execute netstat -a and the command prompt will return a list of computers that your computer is connected to. In the results returned, Proto column gives the type of data transmission taking place (TCP or UDP) , Local address column gives the port with which your computer is connected to an external computer and the Foreign Address column gives the external computer you are connected to along with the port being used for the connection. State gives the state of the connection (whether a connection is actually established, or waiting for transmission or is “Timed Out”).


These tricks work on Windows 8.1, Windows 8, Windows 7, Windows Vista, Windows XP and all previous versions of Windows.Now you know just how useful command prompt can be. Find more awesome tips and tricks in the Tricks section.

How to Fix a Slow Windows 7 Computer

♠ Posted by Unknown in
Most people love using Windows 7. That’s because it’s by far the nicest and the most productive Microsoft operating system to date. But there can still be glitches, errors, and lags. The good thing about Windows 7 is that it has lots of tools to troubleshoot and repair a slow computer. Here is a guide to where to find them and how to use them.

1. Problem Steps Recorder

fix slow computer windows 7
Problem Steps Recorder is a great solution to get a detailed description of the problem, so that you can either review the report yourself or send it to a tech support team. Basically, this tool records everything happening on the computer that needs troubleshooting. It records all mouse clicks and everything that is pressed on the keyboard, takes screenshots, and then saves the report as a zipped MHTML file. This file can be easily emailed and analyzed. To enable Problem Steps Recorder, click on Start, type PSR and hit Enter. Then click on Start Record. To save a report, just stop recording your computer activity.

2. Troubleshoot problems

If something in Windows 7 starts behaving in a weird way and you have no idea why, go to the Control Panel, locate the “Find and fix problems” (Troubleshooting) option and you’ll be able to access the Windows 7 troubleshooting tools. They are easy-to-use wizards and can fix common problems, clean your system, check your settings, and lots more. 

3. Discover bottlenecks

Under normal circumstances, Windows 7 easily outperforms Vista and XP. Nevertheless, your computer can still seem too slow from time to time. Most likely it’s an application or a process that’s slowing you down. Windows 7 makes it really easy to find bottlenecks with the help of Resource Monitor. Just click on Start, type RESMON and hit Enter to launch the tool. When it opens, click on the CPU, Memory, Disk and Network tabs to see which processes are hogging your system and using up your bandwidth. When you find the process that’s holding you back, you’ll be able to try to fix it right from the Resource Monitor. For example, if a process is locked up, right-click on it and select Analyze to see where the problem lies.

4. Repair your computer

If something goes seriously wrong and Windows 7 fails to start, it might be possible to repair your computer without the installation CD. Just boot your PC and press F8 during startup. You should see an option called Repair Your Computer. Select it and press Enter to see the recovery options Windows 7 has to offer.
These Windows 7 tools will help you troubleshoot and fix a slow computer in a quick and easy way. To prevent your computer from slowing down, use maintenance utilities like disk cleanup and defrag to keep your PC in top shape.

Also readTips to speed up a slow Windows computer